 |
| My version |
I was in Park City Utah a number of years ago and saw a roundish cabinet for Singer sewing notions. I was intrigued by the number of drawers. The drawer fronts were flat and not
radiused. I love doing curved surfaces so I thought that it would be fun to make a similar cabinet. All of my drawers fronts are radiused. The original cabinet had dead spaces between rectangular drawers. My drawers are pie shaped. There are 100 drawers in total. The cabinet is 33" tall and 18" dia. The vertical and horizontal dividers are Sapele. The drawer fronts are figured Makore.
I began with 1/2 maple ply. (I detest baltic birch). I started with the idea of having 120 drawers that would all be the same size. However, I changed my mind and made 4 columns of ten that were 45° and 6 columns of 22 1/2°.
I googled how to make a circle cutting jig for the bandsaw and used the bandsaw to cut 4 mdf circles that were 18" in diameter.
(just a note here. If you do not have a bandsaw, the circles can be cut on the table saw but it puts out a tremendous amount of sawdust that will take days to settle. )
This is a picture of the 4 pieces being glued together.

This is one of two completed circle gluing templates.
After gluing the two jigs, they were drilled to accept clamps. I found that I needed more clamp holding holes and drilled smaller holes in between the larger holes. At this point, I assumed that I could form an entire circle without any problems. I was wrong. No matter how careful I was, I would get warping and gaping of layers in the 1/8" bending ply. In other words, I used only 1/2 of the jig. Once I figured out that I needed to do halves rather than full circles, the bends went extremely well.
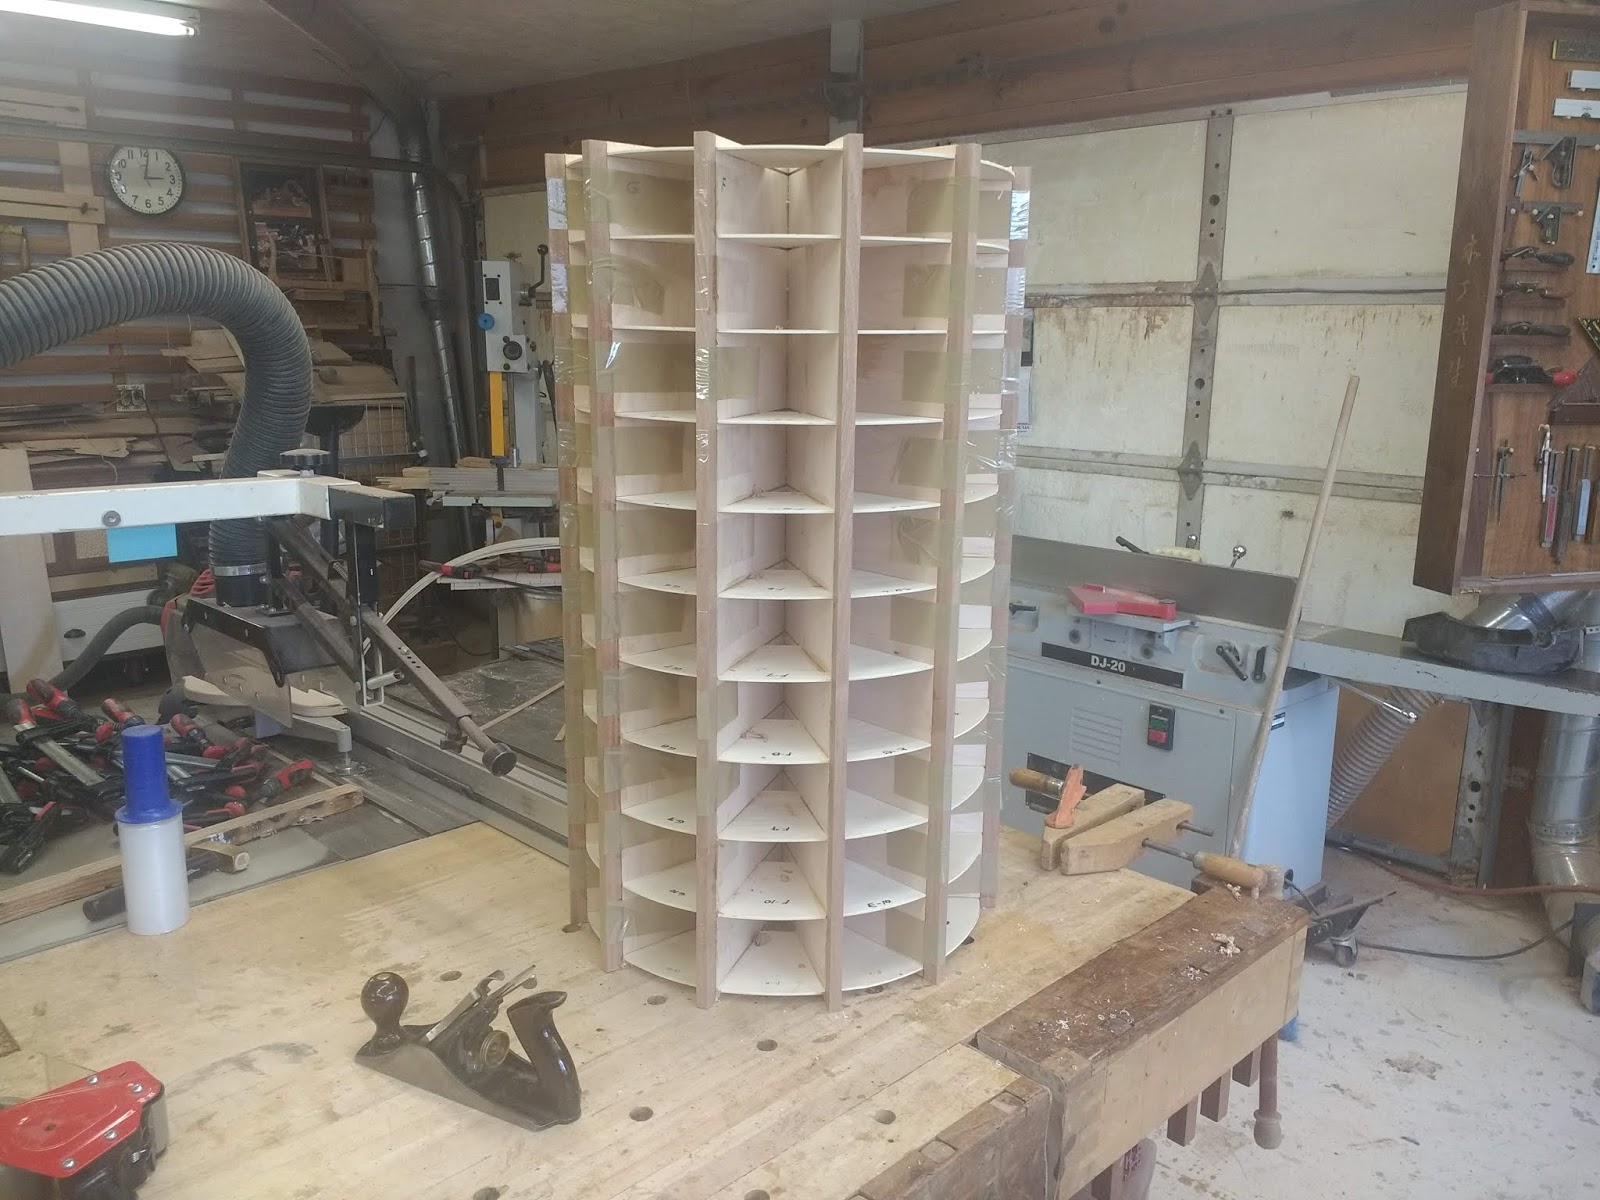
At this stage, I added the Sapele vertical dividers.
The horizontal edges needed to be shaped to fit the shelf bottoms and rabbeted. Although the shelves were close to 45° and 22 1/2°, it was necessary to fit each edge to all 100 drawers.
The drawers were made of soft maple. I resawed a large piece of maple and was able to make all of the drawer sides.

This shows all of the drawer sides ready to be made.
The
radiused fronts all needed to be fit to each opening. I labeled each drawer to make sure that they were put back into the proper opening. Each drawer front was rabbeted to receive the sides. I need to state here that I used only hide glue for the entire build. Why? Because it had a longer open time and cleanup was much better. I also gives a ridged glue line that will not creep like aliphatic resin glue. (yellow glue) The drawer bottoms were held in place using drawer slips. If you look close you can see the slip pieces.
This is a picture of the drawer fronts ready to go to the spray booth. The entire cabinet had shelac coated on it during construction. Pre-cat lac was used as the final coat.
This cabinet was a ball to build. It is my personal cabinet and holds all of my specialty knobs, screws and what ever else I need it to hold. Hope you enjoy.


 This is one of two completed circle gluing templates.


No comments:
Post a Comment